Page 26 of 76
Re: It didn't explode....... YET (aka niges amp)
Posted: Wed Mar 01, 2017 8:57 pm
by Sligolad
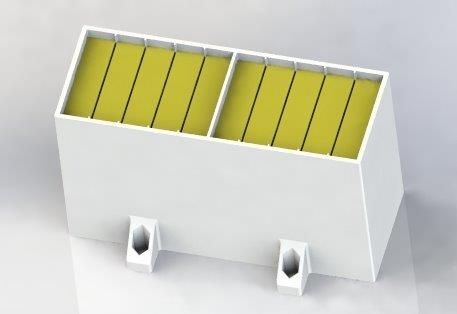
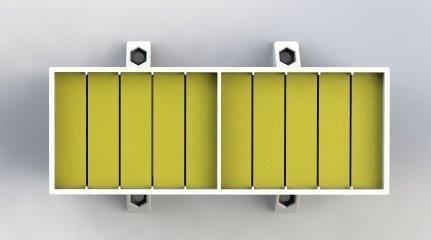
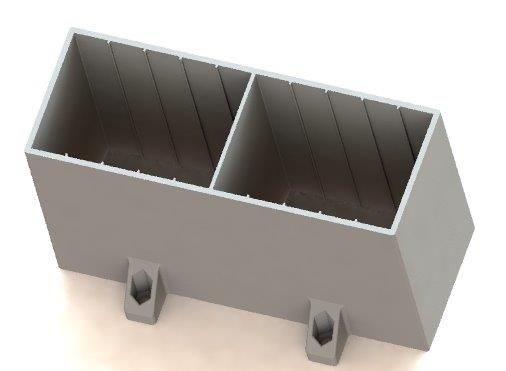
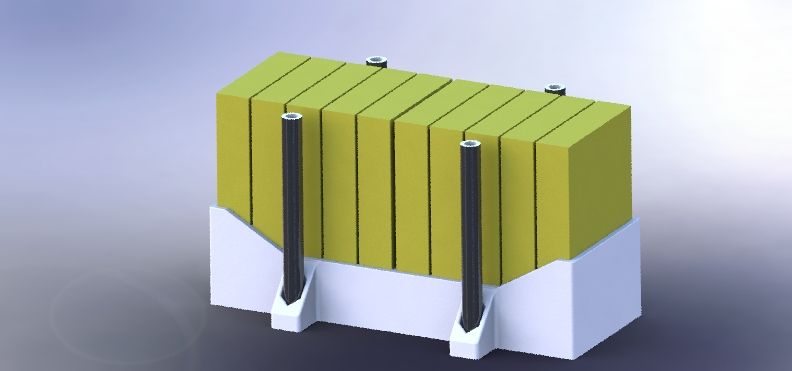
Started printing something like the below Pics today just to get a feel of how strong I need to make this case for 10 batteries.
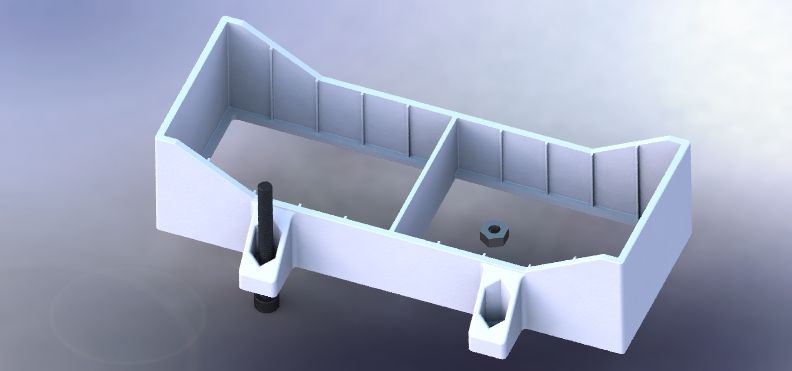
4 x 6mm nuts can be inserted in the feet and bolted in from the bottom.
Will work on a cover once I get the main frame right.
The printing will happen overnight and I will see tomorrow how it looks and feels.
Left a 1mm gap between batteries with a 2mm divider between each set of 5 batteries.
Running the printer with clear PLA material at the moment.
Re: It didn't explode....... YET (aka niges amp)
Posted: Wed Mar 01, 2017 9:08 pm
by Fran
Wow, looks fantastic Pearse!!
Re: It didn't explode....... YET (aka niges amp)
Posted: Wed Mar 01, 2017 10:20 pm
by nige2000
holy shit
thats great
is it possible to have little slots on the top , two each side per cell for the charging wires and ps output ?
maybe a track for the power management/protection circuitboard to slide into in the centre
Re: It didn't explode....... YET (aka niges amp)
Posted: Wed Mar 01, 2017 10:57 pm
by nige2000
actually super impressed with this
allows for expansion well supported and protected non conductive its super cool
pity you cant do heatsinks :)
is it expensive to turn this sort of stuff out ?
Re: It didn't explode....... YET (aka niges amp)
Posted: Wed Mar 01, 2017 11:42 pm
by Derek
That looks the business Pearse, made to measure.
Re: It didn't explode....... YET (aka niges amp)
Posted: Thu Mar 02, 2017 8:03 am
by frd1996
Wow! Looks very, very good. Pearse, I did not know that you have a 3d printer laying around :)
One thing to consider is to make some sort of clamp/cover that would hold the battery cells from the top and prevent them from moving vertically
F
Re: It didn't explode....... YET (aka niges amp)
Posted: Thu Mar 02, 2017 10:05 am
by Sligolad
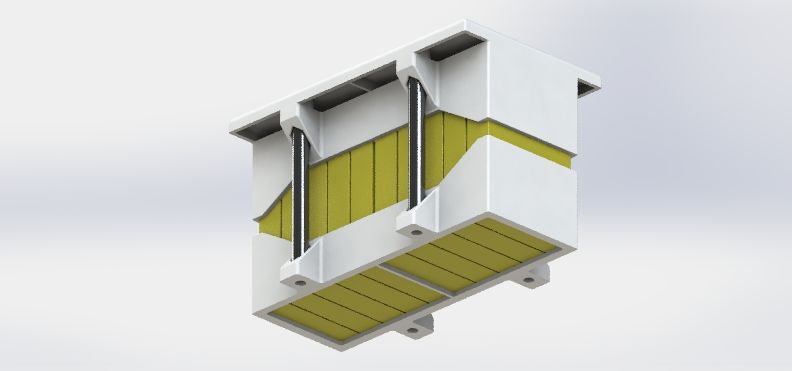
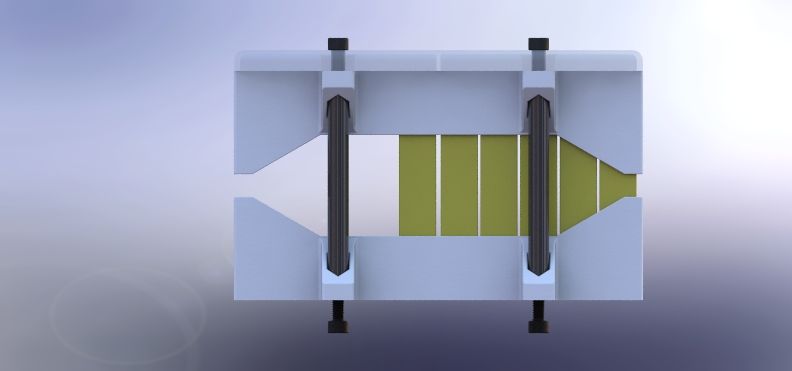
OK print feels very good this morning for stiffness and strength so I will redesign now to cut the height down to about a third of the current height and make 2 of these per 10 cells with one fitted bottom side which can be bolted to the base. This will save time and material and will look better seeing a glimpse of the sides of the batteries, will model later and post Pics.
Once the bottom section is bolted to the base then install the 10 batteries.
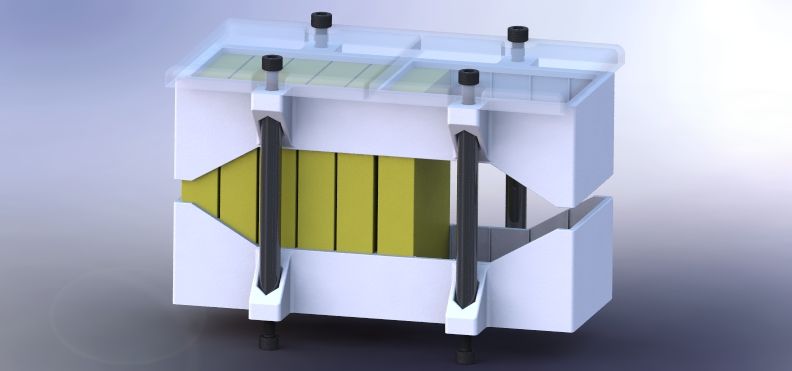
Then fit the second or these cut down cradles upside down over the top of the batteries, there will be a lip to hold the batteries down.
I will look at 4 cylindrical pillar supports between top and bottom cradles to screw the whole assembly together.
A third Cover part will be designed next which will cover the top and be screwed to the main assembly to cover all open terminals.
Nige I can tailor the geometry to add any slot configuration you like and maybe if I can get a full assembly completed by the weekend I could drop these down to you to play with so you can look at where you want access slots for wiring.
I have a roll of White PLA which I will use for the Top & Bottom cradles and I have a translucent roll of PLA which I will use for the Top Cover.
It will not be completely transparent but you might just about make out some profiles underneath.
It is a slow enough process and I will run most of the parts on overnight runs and I will need to order more rolls of material but they are relatively cheap so no worries on costs.
One we get a final design I can start running them off next week all going well.
Re: It didn't explode....... YET (aka niges amp)
Posted: Thu Mar 02, 2017 2:49 pm
by nige2000
sounds good
the priority is to build a production prototype to figure out everything on that before the "mass" production lol...
cases are ordered
im getting quotes for aluminium for all the other mountings atm
so the way its looking we might have a good start on a production prototype end of next wk
so when youve a cradle made up we can meetup and ill give you a bunch of cells
Re: It didn't explode....... YET (aka niges amp)
Posted: Thu Mar 02, 2017 5:40 pm
by Sligolad
OK will make plans next week.
Here is the design I will go with awaiting testing, just printed the bottom section and the Top will run tonight.
Re: It didn't explode....... YET (aka niges amp)
Posted: Thu Mar 02, 2017 5:51 pm
by Sligolad
Assembly sequence should be something like this:
Insert 6mm nuts into 4 feet and bolt to the bottom of the case
Screw on 4 threaded rods....probably make these on the printer as well
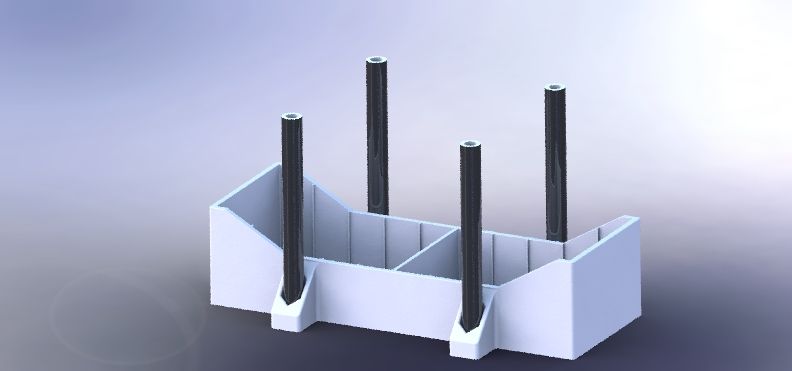
Load in Batteries
Push on second unit over batteries
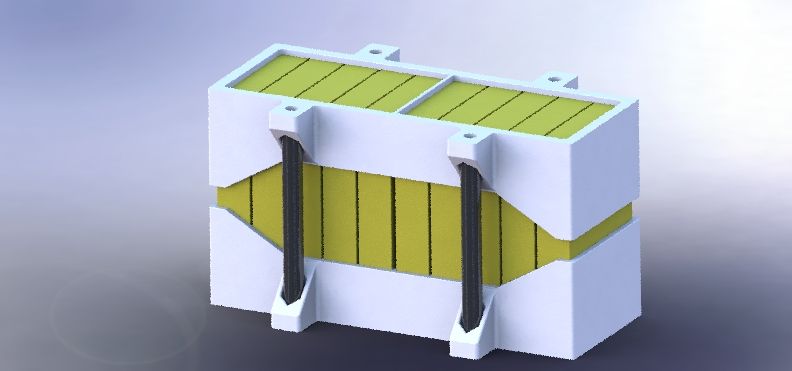
Do all your wiring and then drop on Cover, there is a good space for terminals and wiring
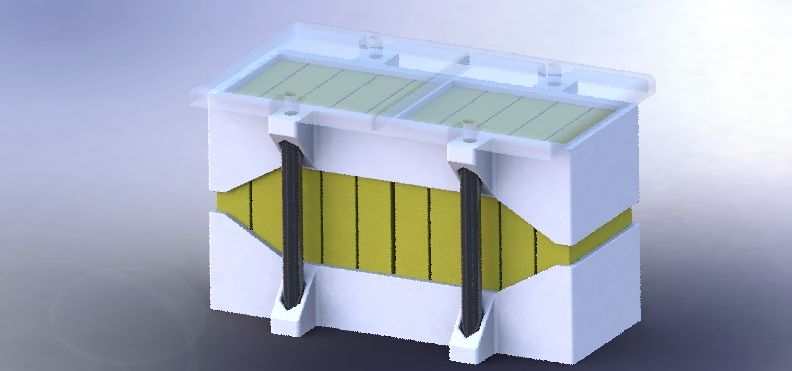
Bolt down Top